How to make a game with Pygame — Part 2
How to make a game with Pygame — Part 2
Adding objectives to our game.
A few months ago I wrote a post that goes over how to make a game with pygame. Please checkout that post first as it lays the foundation for this one. The game was a sandbox and lacked objectives but you could collect raw materials, craft, and build things. In this post we will add an objective to our game that creates something to build towards.
What is our objective?
Before that we need to ask: what is the point of our game? If you want to make a good game it should have a single point. For example Mount and Blade, a great medieval sandbox rpg, is an open world where you can choose your goals, yet it still has a single point: “advance and develop your character.” There are many ways to accomplish this single goal: fighting, trading, tournaments, doing quests, ruling fiefs, founding businesses, raiding. The point of our game is to build structures. Our objective will provide guidelines for each structure to build. We can then add a story or measurement system. “You are a wizard stonemason who is hired to build vaults. You need to get your vault as close as possible to the guideline structure to increase your score.”
What is our mechanic?
The mechanic is the actual things the player does to achieve our objective. I’m thinking the mechanic will be a secondary view where you can press a button and see what the structure should look like and then you can build it. The clouds we added in part 1 obscure vision and also increase difficulty a bit.
We are adding to our game
1- saving the game state so a game can be loaded with prior progress and we can save/load objectives
2- an objective with visualization mechanic to build a specific structure on the map
3- a scoring mechanism to rate the end result
Adding saving
First we are going to add saving to the game. In its most basic form saving the game state and loading it again just involves storing the locations of everything on screen, our character, and our inventory, and populating these values from this save when we load up the game. So the way I’ve implemented saving is to make everything in the game world that I want to save a value inside a python dictionary called game_state then I save this dictionary to a file. Below you can see a video of me saving my game then loading that save.
To save our game you can just press the ‘s’ key and it will automatically create a file called save-file-DATE.save which contains all the info needed to reload our game. Now whenever we have a new feature we want to be save-able we just make sure it is part of the game_state dictionary in our code and it will be saved.
Here is our updated code; as usual new parts of the code will have comments, older already explained parts will not.:
Adding the objective
We are going to use our save functionality here to make our objective. We are going to make 2 world states that the player should work towards. These world states are pretty designs/layouts for our little game. The goal is to get the world as close as possible to this world state. So I will create these states and save my game and then load them into a new mechanic we will call ‘future sight.’ If we press/hold ‘f’ we will be able to see the structure we need to make superimposed onto the map. Below you can see me examining an objective.
You can create your own objectives by making a structure then pressing the ‘o’ key which will save just the tilemap from the game_state as an objective file. Then to use that as the objective for a level you have to load it like I did on the command line. Here is the code:
Adding scoring
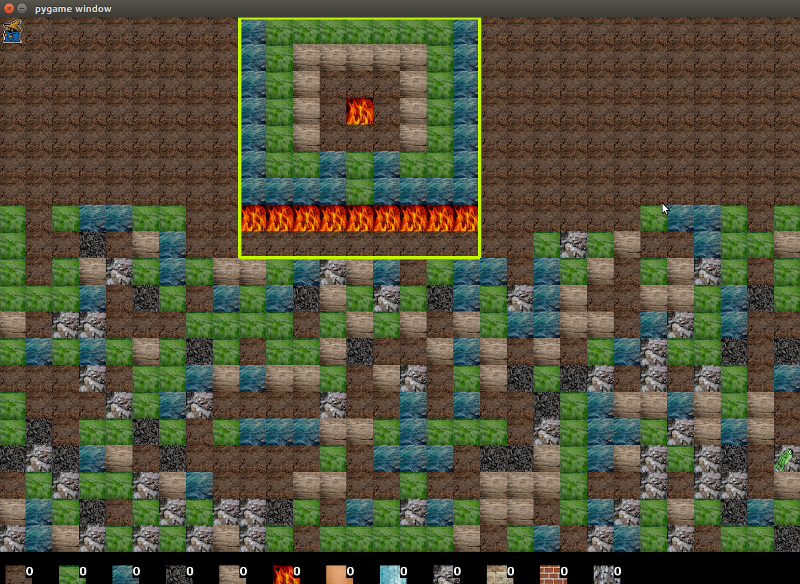
You may notice that we have no way to score the end product. What we will do is create a yellow outline in the objective view (the view that shows our goal structure) and this yellow outline will denote the scoring area. To score our game we press ‘e’. This gives us a score based on how close our structure is to the objective. I updated our function that saves objectives to now save the tilemap and an empty rectangle called scoring_rect. To add a rectangle you can update the values in the objective file under the key scoring_rect. The values are in a list and there should only be 4 (x,y,width,height of the rectangle). You can open the objective file in any plain text editor and make whatever scoring area you want. Here is a video of me attempting to build this objective then scoring it with our new scoring function. As you can see I score it several times going eventually to a score of 81. This video is a bit longer, feel free to watch it on a faster speed.
Notice I am constantly checking the objective with ‘f’ to see what I should be building.
Here is the code:
Conclusion
The complete code, including some saves and objective files, can be found here:
https://github.com/yvan/nbsblogs/tree/master/howtogame_2
In this post we added saving and we added an objective to our game. To make the game a little harder we can add a time limit or we can add a small character who disrupts/moves your blocks around that you have to chase off. I will leave these as an exercise for the reader. If you enjoyed this post be sure to checkout my newsletter Generation Machine.
As always have a good day.